Overview
Introduction
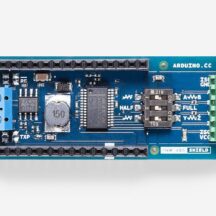
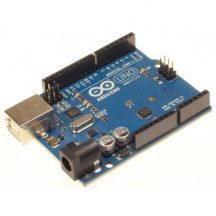
The Education Shield is a custom-made shield designed by Arduino Education, specially tailored for educational purposes to enable quick and easy learning while building projects. The shield is meant to be used in conjuction with the CTC Program. It connects to an Arduino 101 or UNO and extend their capabilities. The shield has a collection of features that make building small projects in or outside of the classroom easy:
- Reset button. When this is pressed the program uploaded to the control board is restarted.
- Built in protoshield or used as a placement of breadboard.
- Digital input and output pins. Directly connected to the digital pins on the board.
- I2C connector.
- A1 3-pin header port: Analog out/in. This can also be used as a digital in/out.
- D6 and D9: digital 3-pin header ports connected to digital pin 6 and 9.
- Speaker plug:This is connected to digital pin 11.
- Ground and power pins. The voltage supply pin used in CTC is the IOREF pin. This pin outputs different voltages depending on the board (101 board: 3.3V, UNO board: 5V).
- Analog input/output pins.
- SD card reader/writer connected to digital pins 10 to 13.
Note:
- Avoid using analog A4 and A5. These have pull-up resistors connected to them and you should avoid using unless you know what you are doing.
- Do not use digital pins 4, 10, 11, 12 and 13 when using the micro SD card reader.
- Digital pins 9 to 13 cannot be used for capacitive sensors, these are connected to the SD card reader which has resistors and might therefore provide false readings.
- Digital pin 6, 9 and analog pin A1 are connected to component module ports. If the ports are used don’t use the corresponding pins.
- Digital pin 11 is connected to the audio socket. If the socket is in use don’t use the pin.
Use Modules with simple connectors
A simple 3 pin connector, that snaps in place, is used for all 3-pin modules. Here are some examples of components All these make connecting and prototyping easier through their simplified design: Push button modules, light sensor modules, and power LED modules.
If you’re trying to connect servos or other 3-pin modules, be sure about the direction of the connector so that GND is connected to GND, power to power and signal to signal. The color of a simple connector wire helps you remember it: red means power, orange or white means signal, and black means GND. Technically you can connect modules with simple connectors without 3-pin ports, as long as you plug the wires to the right pins.
Tech specs
| Connectors | 1x I2C 4-pin connector* 1x 3-pin analog connector* 2x digital 3-pin connector* 1x pwm audiojack Plus extensions of the pins from the board. *Sullins Connector Solutions SWR25X series connector, commonly called “tinkerkit” connector” |
| Interfaces with Arduino Board | DIO |
| Operating Voltage | 3.3 V (Arduino 101) or 5 V (Arduino Uno) |
| PCB Size | 53 x 71.2 mm |
Conformities
Documentation
OSH: Schematics
The Arduino Education Shield is open-source hardware! You can build your own board using the following files:
Get Inspired
BLOG

… usar, los alumnos simplemente tienen que conectar el dispositivo Android a la placa, montar el proyecto, y después usa los sensores que contiene la shield y los módulos plug-and-play para simular las atracciones. Los datos son transmitidos del experimento a el dispositivo móvil del alumno via Bluetooth, donde se puede ver y analizar el resultado obtenido en la app Science Journal de Google o en las fichas de los alumnos. Arduino Education Science Kit Physics Lab no está pensado para usarse únicamente en clase. De hecho, los alumnos pueden usar el kit en exteriores para convertir su recreo en su propia feria de ciencia aplicando los conceptos que han aprendido, y así, diseñar y probar sus propias atracciones. Basado en el uso de Arduino MKR WiFi 1010 , que es un laboratorio portátil incluyendo un grupo de sensores para medir luminosidad, temperatura, movimiento, campos magnéticos y mucho más… todo esto en una caja Gratnells protectora. Arduino Education apunta a apoyar a los profesores proporcionando nuestros programas, contenido online y las hojas del alumno en el mayor número de idiomas posible: no solo en los idiomas Europeos relevantes, por ejemplo, Árabe y Japonés están planeados para futuras actualizaciones. Lo siguientes idiomas para Science Kit Physics Lab serán Alemán, Húngaro y Portugués. MÁS INFORMACIÓN Da oggi Science Kit è disponibile anche in italiano e spagnolo. Nel Gennaio 2019, in collaborazione con Google, Arduino Science Kit Physics Lab è stato lanciato sul mercato, per studenti di scuola media (tra 11 e 14 anni) e non solo, con l’obiettivo di esplorare la scienza, divertendosi. Da oggi, i contenuti del corso sono disponibili in italiano e spagnolo, rendendolo ancora più accessibile. “Sei tu che esperimenti in prima persona, ed è stato davvero divertente poterlo fare” ha commentato uno studente inglese dell’accademia di ARK Burlington Danes. Arduino Science Kit Physics Lab